Todd's Guide to Creating Video Tutorials
Welcome to another “Blog post that could probably be a 10-part series all on its own” – recording yourself on camera!
Putting yourself in your videos is a great way of connecting with your audience. Suddenly, they’re interacting with a real person and not just a corporation. And it can be a nice way of establishing your personal brand, which is helpful if you plan on doing a lot of video content.
But it’s also a lot of effort to do this well, and your nice clean WFH office is suddenly going to have a lot of extra clutter to deal with.
So I’d mentioned this earlier, but I feel like recording yourself on camera is probably not worth the effort unless you’re already pretty comfortable with filming yourself, or you plan on creating multiple videos. If this is just a one-off, you can probably skip it. Some of the most successful screencasters out there never have their faces on screen.
In general, I like to put myself on screen at major transition points, as a way to introduce the next section. I’ll also put myself on screen when I need to explain something and can’t think of a good slide or visual element to go with it.
That said, let’s talk about the process! Most importantly, let’s start with the equipment.
The Camera
- If you happen to have a fancy camera already, great!. You probably want a mirrorless camera that can take 4k video, and you also want a good 50mm lens, which is optimized for “Waist-level portraits”. Also, you want to be able to see what your camera sees when you’re out in front of it, so I recommend one with a LCD screen that flips around, or one that can attach to your computer.
- I know when I was at Google and we were all working from home, they loaned out some Sony a6600s for us to take video with, and they were pretty good! Sadly, I had to return it when I left.
- They also shipped with lenses, but I forget which ones.
- I know when I was at Google and we were all working from home, they loaned out some Sony a6600s for us to take video with, and they were pretty good! Sadly, I had to return it when I left.
- But these things are expensive, and I no longer work at a company with a 3.45 trillion market cap.
- So instead, I use an iPhone! It takes perfectly adequate video! There’s probably more setup time involved (see below), but it generally works good enough for the types of videos I make.
- Sometimes when I was filming at Google’s professional studio, they would have a two-camera setup, so that you can easily cut between one camera and the next. But that’s overkill for what you’re doing.
Other Equipment
- You’re going to want a tripod, and, if you’re using your phone, an attachment for your phone.
- You also need good lighting. Honestly, this is probably the thing that will make the biggest difference in how you look. At the very least, you’ll want 2 lights – one at about 10 o’clock, and one at about 2 o’clock so that your face is fully illuminated without any shadows.
- I have a Lume Cube Ring Light for my main light, and then a smaller desk lamp for my secondary light.
- My Lume light lets me try different light temperatures, from the cooler blue-ish hues to a warmer yellow light. I honestly don’t know which temperature works best. I’m still experimenting, but I think I’ve settled on 31% for the “power” and 3800k for the color.
- Since neither of these lights are particularly strong, I also have the overhead light on in my room, which I think is probably a no-no for most professional lighting people, but it works for me.
- Does your light need to be a ring light? Not necessarily. I think you get the most benefits of a ring light if you’re close enough to the camera that the ring actually illuminates your face from all angles. Mind happens to be in a ring shape, but from the distance I record at, it’s really just a directional light.
- Unless you’re already in the habit of applying makeup, I would recommend ordering some Clean & Clear Oil Control film. It’ll remove some of the highlights from your forehead and nose that make you look greasy.
- And then I would probably recommend getting yourself a teleprompter. I held off on this for a while because I didn’t want to deal with the extra equipment, but I probably should have gotten one earlier; it makes my life a lot easier. You can get a teleprompter that works with a tablet as its display, and then I use the Teleprompter Pro app to display the text on the tablet.
Ready to record?
So, got all your equipment set up and ready to film? Lemme take you through the steps I go through when I record:
Video settings
First, make sure your video settings are correct.
- On the iPhone, that means filming in 4k resolution (the default is 1080p, so you need to change this) at 30pfs
- My final videos aren’t at 4k, but filming at a higher resolution like this gives you the ability to “punch in” (i.e. cut to a more zoomed-in version) whenever you want, which is helpful
- Also, turn HDR off. For reasons I don’t really understand (and this might just be user error), HDR video looks weird when I import it into Premiere.
- Most importantly, don’t use your front-facing camera. You’re going to want to use the rear camera with the bigger camera lenses.
Check your camera
Second, you need to make sure you can see what your camera sees, just to make sure you’re framed correctly.
- If you’re using a fancy camera with an LED screen, some of them actually let you flip the screen around.
- If you’re using a iPhone, the best way to do this is to get yourself an Apple Watch. The Camera app on the watch will let you see what your camera sees.
- If you don’t have an Apple Watch, there’s a hack to do this using QuickTime…
- Connect your phone to your computer with a physical cable, open up your camera app on your phone, turn on QuickTime, select “New Movie Recording”, then select your attached phone as the video input, so you can at least preview what your camera sees.
- But, honestly, this is enough of a pain that I would just recommend splurging for that watch.
When it comes to framing, you probably want something like this. Your face should be in the upper-right third of the screen, and the viewer can see the upper half of your torso along with your hands if you hold them up in front of you.
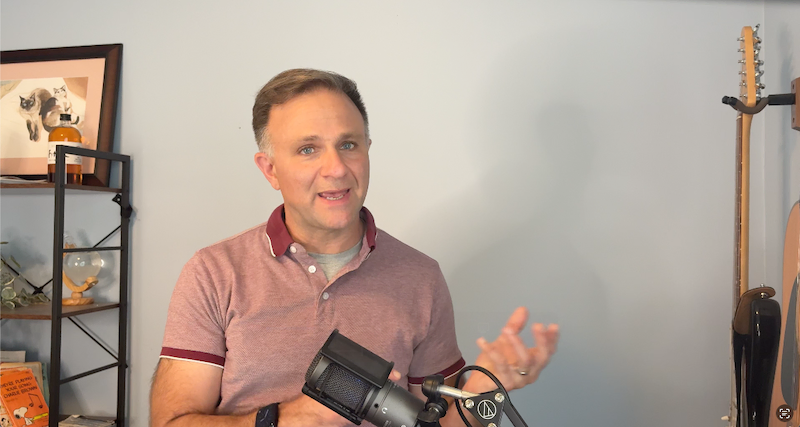
Initial framing
Note that this is more zoomed out than what I’ll use in the final video – in the editing phase, I’ll zoom in so that the top of my head is just off screen. But recording slightly zoomed out at 4k gives me the freedom to adjust the framing later as needed
After I've zoomed in. That space in the upper right is typically used for Keynote animations.
Mic check
Third, get ready to record with your fancy microphone!
- So, yes, while you’re recording your video with your camera, you still want to record the audio with your fancy microphone.
- I imagine there’s some way to get your USB microphone to record directly into your phone / camera so it’s all part of the same recording, but I haven’t figure it out yet.
- Instead, I record the audio separately into Descript (since I’m processing the audio there anyway), and then I sync up the audio and video at a later step.
Start recording!
Okay, finally we can start recording!
- Start the recording on your microphone. Again, make sure Descript is recording from the external microphone and not your laptop microphone.
- Then start the recording on your camera. If you don’t have an Apple Watch, I would recommend getting a cheap Bluetooth camera remote, which will allow you to turn on and off your recording without accidentally jostling it in the tripod and/or teleprompter.
Recording tips
Want to look and sound good on camera? Here’s a few assorted tips and tricks.
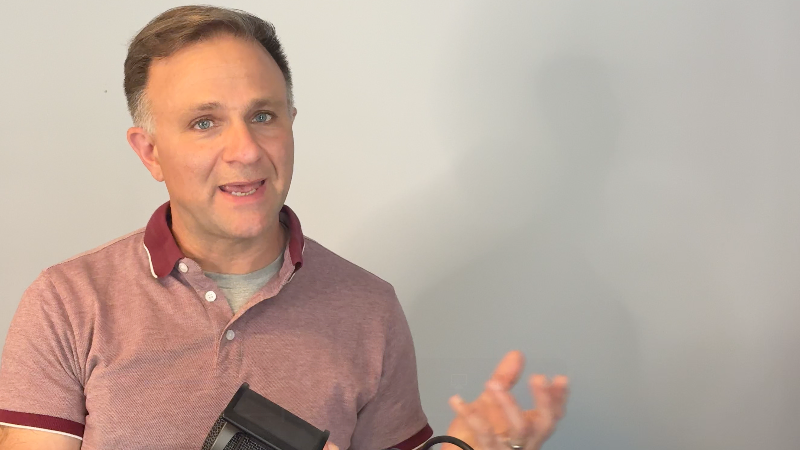
- If at all possible, look directly at the camera
- There’s lots of studies on the power of direct eye contact. If somebody is staring at you, you suddenly feel a lot more obligated to pay attention There’s always something a little off-putting when a presenter is supposedly looking at the camera, but their eyeline is off because they’re actually reading their script on a nearby monitor.

Are you paying attention to the blog post? Or do you keep getting distracted by the eye contact
- Before I got a teleprompter, I would print out my script in a real big font and tape it right underneath my camera. I would then glance at my lines as a reminder of what I was going to say, but then I would try to say everything from memory while looking directly into the camera. * It mostly worked, but if you watch carefully, you can catch me glancing away at times. * That said, I mostly rely on the teleprompter these days and, while it’s a lot more equipment and setup, it’s a lot less memorization.
- There’s lots of studies on the power of direct eye contact. If somebody is staring at you, you suddenly feel a lot more obligated to pay attention There’s always something a little off-putting when a presenter is supposedly looking at the camera, but their eyeline is off because they’re actually reading their script on a nearby monitor.
- Go for an energy level that’s 15% more than in real-life
- Remember, you’re going to be shown on a tiny screen and some of your subtle nuances will be lost. So go for an energy level that’s a little bit higher than normal.
- But also, be genuine. You don’t have to be fake-excited about something you’re not actually excited about. That kind of insincerity will show through.
- Use T-rex arms!
- It’s good to have your hands on-screen so you can gesture along with the points you’re trying to make. It makes things more interesting and dynamic!
- I’ve heard that this makes you seem more trustworthy, too, because it’s telling the viewer’s caveman brain that you’re not brandishing a club or something.
- Not sure if that’s true, but it sounds plausible!
- So you want to hold your hands up in front of your chest in, like, a little T-rex pose. It’ll feel a little unnatural at first, but it starts to become second nature after a while.
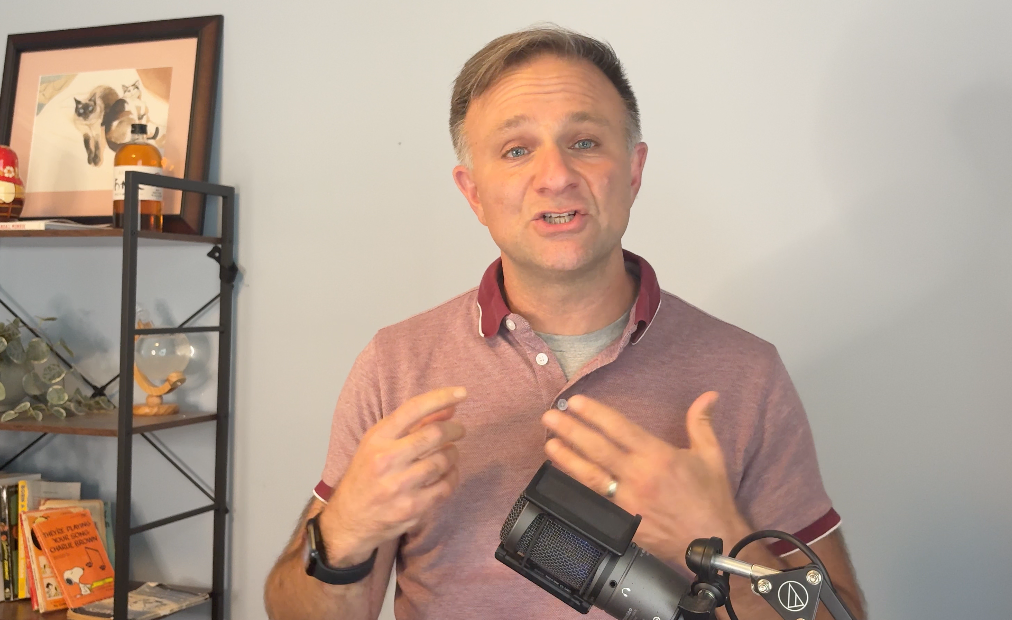
I never hold my hands up like this in real life, but in video, it looks good.
- Since my on-screen bits are fairly short, I try to make it through each section (okay, let’s call it a “scene”) in one continuous shot.
- It’s not a huge deal if you can’t get through it in one take. You can always cut between one line and the next – but I think it looks a little nicer if you can get it all at once.
- So if I flub my line, I’ll just start over again from the beginning of the scene. I’ll just keep the camera rolling, and I’ll do several takes until I get it right.
- When I do have a take I like, I’ll clap afterwards as a way of reminding myself that was a good take. It’ll show up prominently in the audio waveform so I remember which take I liked.
- But record each scene as a separate file
- This is really just because I’m paranoid about something crashing in the middle and losing all my hard work.
- When you’re all done, keep looking at the camera for a second or two!
- You’re generally going to have some kind of transition between this scene and the next, and it helps a lot if you can keep looking at the camera instead of looking down immediately, as I’m prone to do.
Saving those files
When you’re all done, you probably want to transfer your files to your computer. Surprisingly, this can be one of the trickiest parts. (Particularly with my corporate laptop, which is more locked down than a typical device.)
- If you’ve got a real camera, you’re probably recording to some kind of SD card. Get yourself a USB-C card reader off of Amazon. They’re pretty cheap.
- If you’re on an iPhone, I would get a physical cable and connect your laptop to your phone.
- Use Image Capture to select the images you want to transfer, and download them to your downloads folder. Don’t add it to your Apple Photos library or anything — that puts your movies into this internal library format, and you’ll need to re-export them in order to use them in a program like Premiere,
- You can also try using Airdrop, but I feel like it only works for me about 30% of the time.
Wow! Have we actually created all the visuals we need? I think we have! Time to start editing!
(Part 9 coming soon!)