Todd's Guide to Creating Video Tutorials
So if you’re working on a screencast video where you’re recording your screen, I highly recommend you do the screen recording first before you record any audio. This is because you will inevitably discover some missing step or incorrect bit of instructions in your script while you’re doing your recording, and it’s much easier to go back and edit your script before you’ve done any audio or on-camera recording.
Also, sometimes, you’ll make a mistake and you’ll realize that it’s a super common mistake and it’d probably be really informative to show your audience what this mistake looks like and how to fix it. So you can turn this into a “I totally meant to do this so I can show you this error” situation and you look really smart.

It’s also a good idea to make sure your script is mostly approved before recording your screencast. You don’t want to find out you missed an important step in your code, or something’s been deprecated right after you’ve finished recording.
For my screen recordings, I use Camtasia for the Mac. I’ll talk about this a little more in the video editing section, but I do recommend Camtasia if you’re going to be doing a lot of screen recording videos. It’s got a nice screen recorder, and its editing tools are specifically designed for editing screencasts — things like panning * Okay, technically, this is more like 'tracking' for all you film geeks, but I'm going keep calling it 'panning' and zooming around your screen are handled nicely, and it makes it simple to “draw” on your screen with annotations and the like. (I have also heard good things about Screenflow, but I haven’t tried it yet, so I can’t really recommend it one way or another.)
But before you start recording your screen, there’s a lot of set-up work I recommend you do first!
Prep work
Don’t let this list intimidate you! A lot of this is “one-time only” kinda stuff.
A quick word about security
So I’m very paranoid about leaking any information about my system in my screencasts, whether it’s API keys I’m using, or programs I have installed. And for good reason — there have been cases where companies have been hacked because an engineer accidentally leaked an API key in a screenshot in a blog post. You don’t want be that engineer.
So I like to make sure I give the outside world as little information about my system as possible. This includes information like:
- Chrome extensions I have installed
- Applications I have running
- Websites I’ve visited (which might show up in Chrome’s auto-complete suggestions)
- Client IDs, login names, email addresses, or anything else that might show up in a dashboard
- And more!
In addition, you need to be careful about accidentally leaking beta features and/or unreleased products that you might be opted into with an official corporate account.
So to help with all of that, there’s a few things I’d recommend you do before you start screencasting:
- First, create a separate consumer Google account. I’ve created one that I really only use for demos. This also means that if your email address gets exposed, it’s not a huge deal.
- Then, create a separate Chrome profile for this account. This profile will have its own browser history, set of cookies, and so on. Don’t install any unnecessary extensions on this profile.
- If your company requires a developer account, create a new one that’s associated with this demo email address. Make sure it’s not opted into any beta programs or early access programs for features you don’t want announced.
I’ll also try not to “rehearse” anything using my demo profile, because sometimes there are first-time-user flows that you’ll want to record, and this is a good way of making sure you encounter those.
After the recording is done, I also like to rotate out any secret keys, just to be extra safe.
Setup VS Code for recording
There’s a few things I like to do with VS Code so that it shows up better when recording. If you’re not using VS Code, your IDE probably has similar settings you can adjust.
- Create a separate VS Code Profile
- At some point last year, VS Code allowed you to create different profiles. So you can create one for day-to-day development, and one for presenting. That’s what I’ve done and it makes my life a whole lot easier.
- You can do this by selecting Code -> Preferences -> Profiles -> Create Profile and give it a name like “Recording” or “Presenting”
- Once you’ve switched to this profile, you can then make adjustments specific to this profile by changing the preferences just for this user.
- Turn off hints
- While VS Code pop-up hints and documentation is super helpful when you’re developing, it’s really distracting to show in the middle of a screencast.
So. Much. Help.
- Luckily, you can fix this by adding the following to your
settings.json…
  "editor.hover.enabled": false,
"editor.parameterHints.enabled": false- Note that this doesn’t remove auto-completion, which you usually do want to have in your screencasts. (Unless you’re an amazingly accurate typist.)
- Turn on a code formatter like Prettier, and set your printWidth to somewhere between 80-100
columns
- If your code is relatively narrow, that will let you zoom in without having to worry that some of your code is truncated off screen
- Granted, this might mean you might need to scroll up and down while you’re adding more code, but that’s more acceptable than having to pan left-and-right or zoom out too much.
- Disable the status bar.
- I find the status bar at the bottom kinda distracting. You can turn it off my adding the following line to your settings:
"workbench.statusBar.visible": false- Disable any other extensions you might have installed that would be a distraction
- In particular, watch out for any tools that like to display lots of helpful text inline. While they might be useful to you while you’re coding, it’ll draw attention away from your code during videos.
- Move the VS Code sidebar to the left
- This is really just a note for me, because I’m a weirdo who likes to have my sidebar on the right during normal development.
- But if you keep your sidebar on the left, you can have your files and folders right next to your code, which means you don’t have to pan around as much when you want to show yourself opening up another file
- You can adjust this by running the View: Toggle Primary Side Bar Position command in VS code.
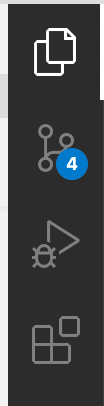
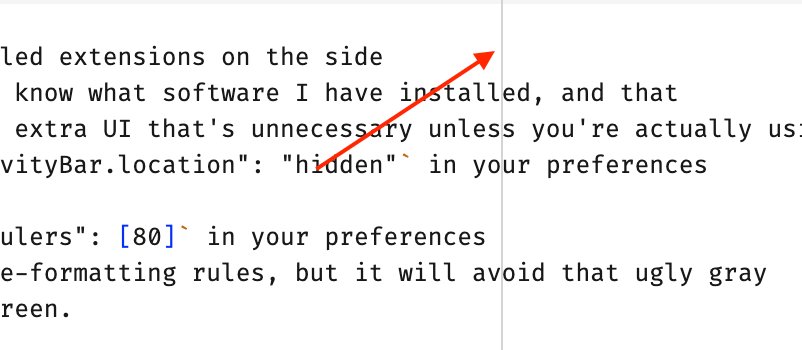
- Hide the activity bar
- Thats the thing that shows all your installed extensions on the side
- Again, I’m not a big fan of letting people know what software I have installed, and that includes VS Code extensions. But also it’s extra UI that’s unnecessary unless you’re actually using it in your recording.
- You can do this by adding
"workbench.activityBar.location": "hidden"in your preferences
- Remove any visible rulers
- This shows up as something like
"editor.rulers": [80]in your preferences - This won’t change any of your prettier line-formatting rules, but it will avoid that ugly gray
vertical line on the right side of your screen.
- This shows up as something like
- What about light mode / dark mode?
- Personally, I like using light mode, because Camtasia has a “highlight block of text” tool that works much better when it’s set against a light background.
- But there have been some developers who make fun of me for it because dark mode is all the rage right now. So you do you.
Camtasia setup work
There’s also a few things I like to do to make sure my Camtasia recording looks better. Again, most of this is one-time setup work you’ll only need to do once.
- In your system settings, turn off “Shake mouse pointer to locate”
- You’ll find this under System preferences -> Accessibility -> Display. Make sure “Shake
mouse pointer to locate” is unchecked. Leaving it on can result in an enormous pointer appearing
in your screen recordings.
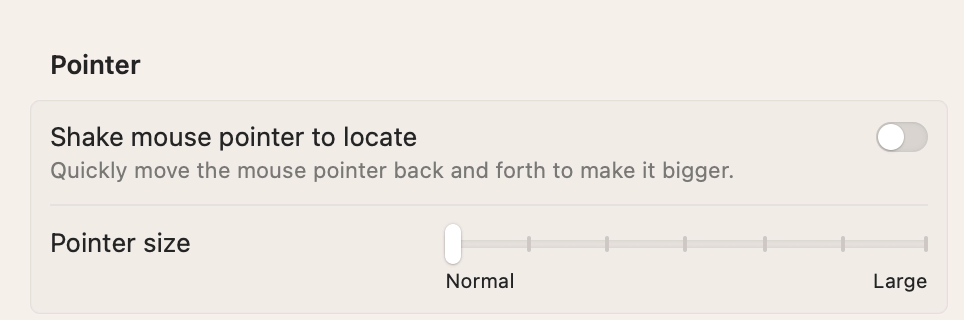
- You’ll find this under System preferences -> Accessibility -> Display. Make sure “Shake
mouse pointer to locate” is unchecked. Leaving it on can result in an enormous pointer appearing
in your screen recordings.
- Within Camtasia, you also might want to adjust the size of your mouse. By default Camtasia
versions 2022 and higher will enlarge your mouse pointer to 225%. You can adjust this via
Camtasia -> Settings -> Recording
- Messed this up? Don’t worry! You have the ability to change this (or hide your cursor entirely) later.
- You should also change the default size of all Camtasia projects to be 1080p
- This is in the Camtasia -> Preferences menu.
- By default, Camtasia projects will pick a canvas dimension equal to your screen recording, which is close — but usually not quite — equal to the target video size
- By selecting your canvas dimensions at the beginning, you’ll make sure you have the correct dimensions for your final project from the start.
- Trust me, once you’ve gotten burned on this once and realized you’ve created an entire project that’s 1846 x 1120, you won’t make that mistake again.
Other cleanup and prep work
There’s a few other steps you should perform before moving ahead with your first recording.
- Print out your script — You’re going to need to follow along with your script (and make
notes) as you’re recording your screen.
- For those situations, I prefer to have a hard copy of my script next to me on my desk rather than trying to follow online with a soft copy in a separate window
- If you want to save paper and print it out double-sided, go for it, but make sure to include page numbers. Trust me.
- Have a red pen next to you so you can quickly jot down notes in your script as you realize you need to make changes
- Quit all other applications / all other open tabs
- This is partly because you want to save on system resources. I don’t want my screen recording to stutter because some other application is using up all my CPU power.
- And also because I don’t necessarily want people to see what other software I’m running when I command-tab to switch between them.
- But also because Slack loves to pop up messages at the most inopportune times.
- Clean up your desktop!
- Is your desktop littered with files? Do some of those maybe have names that are leaking unannounced products? Either way, you should probably clean then up!
- This is as easy as creating another folder on your desktop, and dumping all of your desktop files into that folder.
- I suggest giving the folder a funny name as a little easter egg for people who take the time to pause the video.
Let’s start recording!
Okay, we’re finally ready to record! Here’s a few tips for making sure your recording looks as nice as possible…
- Record off of your Macbook’s retina display (unless you have a super fancy monitor, I guess).
- Even though (or maybe because?) I have more real-estate on my external monitor, I get better quality video when I record off of my retina display — the “pixels per character” value is much higher, which means my text looks significantly better when it’s zoomed in, and I do a lot of zooming in my videos. (See the above note about text size)
- If you typically have your computer docked, you can get the same quality using an external monitor if you crack open your laptop screen a little bit, but then have “Mirror displays” turned on in your display settings. That’ll let you keep using your mouse and fancy keyboard while you’re recording.
- Record your entire screen
- Camtasia gives you the option to record a chunk of your screen, or the entire screen. Personally, I think it’s better to record the entire screen, and then later zoom in to the specific sections of your screen that you need.
- I almost always crop out the top menu bar from my recordings, but I also usually do that after the fact.
- …but maybe not your system audio or keystrokes
- Camtasia also gives you the option to record your keystrokes. If you’re creating a screencast for a tool that uses lots and lots of hotkeys (Photoshop, Blender, etc.) I could see this being useful. It’s less useful for coding, and I’m not really sure I want to be actively using a keylogger (see my above note about being paranoid). So I leave this turned off.
- You can also (through an additional component) your system audio. I’ve never really needed to do this, because I end up overwriting the audio with narration. So I leave this off too.
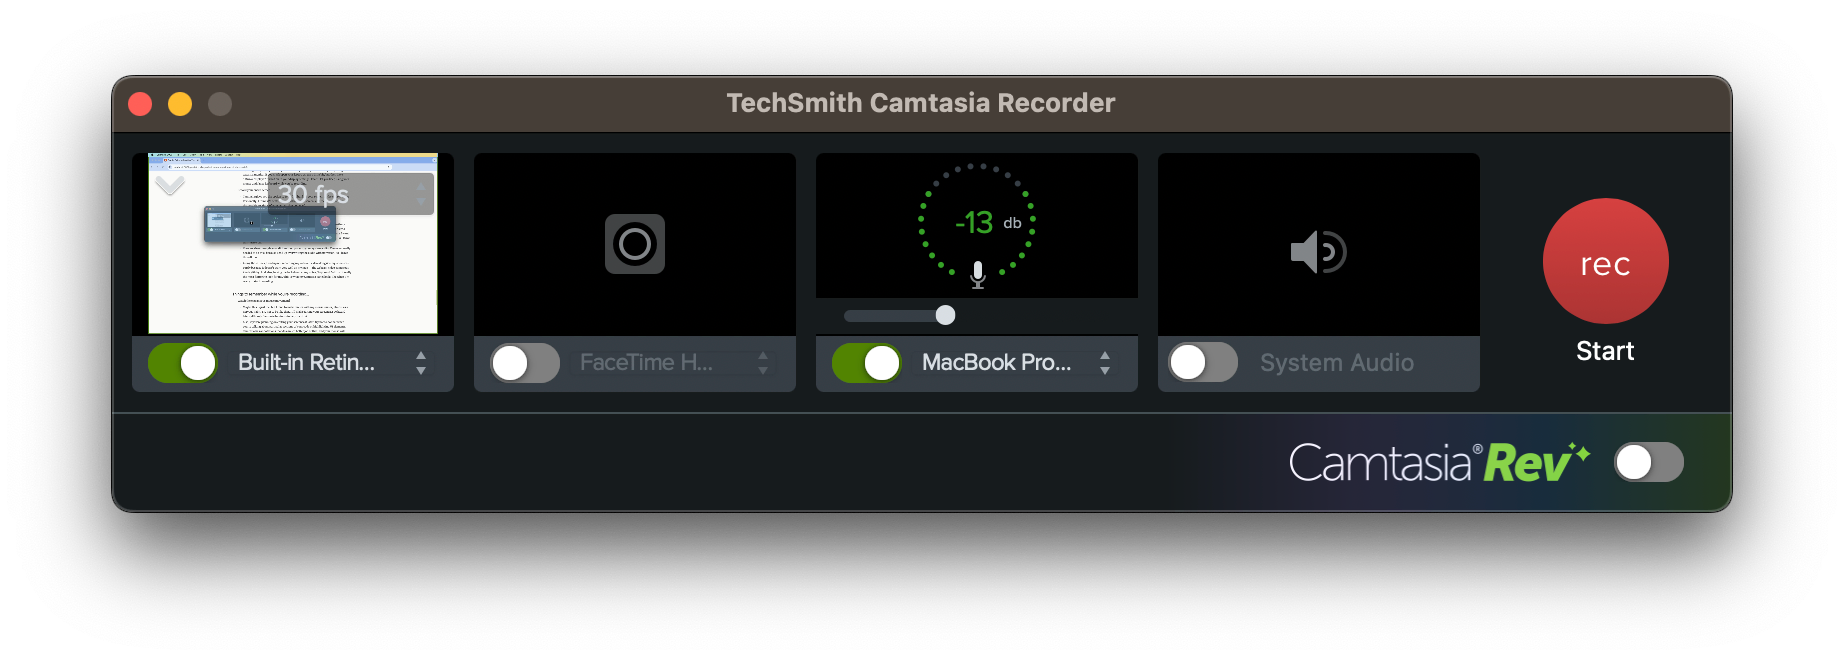
- Along those lines, I end up not recording my webcam video alongside my screencast. Partly because it doesn’t work very well on my mac — the webcam video comes out kinda glitchy. And also, having me look down at my notes / keyboard / etc. isn’t really the most flattering look for me. This is what my Camtasia panel looks like when I’m ready to start recording.
Things to remember while you’re recording…
- Watch the extraneous mouse movement!
- Maybe this is just me, but I tend to make circles with my mouse cursor, almost as a nervous habit. Try not to do that. It’ll make editing your screencast awkward later (although Camtasia has tools to help fix this)
- It’s really tempting to do this when you’re talking about particular sections of your code or highlighting UI elements. Camtasia has annotations that do a much better job of that, and your mouse will probably just get in the way.
- Do it all in a single day.
- It’s really helpful if you can do all of your screen recording in one single block of time.
- If you try to break it up into multiple days, you’ll lose track of what window was located where, or what files were open, or where you scrolled to in a particular file, and the transitions between recordings will start to feel messy.
- But you don’t need to do it all in a single recording! I’m a little paranoid about Camtasia crashing. So I make sure I stop my recordings and save them every few minutes at natural breaks in my script.
- Since my scripts often bounce back and forth between screen recordings and “Todd in the studio on camera”, that’s usually a good time to stop your recording and save it.
- Don’t worry about being too slow or making typos. You cam fix that in editing.
- Try Jeff Delaney’s undo trick!
- Do you have a bunch of code that you want to get on screen in several quick chunks? Try this…
- First, have your finished code on screen.
- Then, delete your code in the reverse order that you want to show it. (Need to show steps 1, 2, and 3? Delete step 3, then step 2, then step 1.)
- Then, while you’re recording, hit undo several times. Your deleted code will pop back on the screen. It’ll even be highlighted!
- This is a trick I use a lot in my “x in 3 minutes” videos where I’m displaying code that I don’t intend for my users to actually follow along to. It looks super slick.

All I'm doing is hitting Command-z several times.
- (Maybe) Read your presentation out loud as you’re recording
- I often like reading (or, more accurately, semi-mumbling) my presentation out loud as I’m recording. This can be helpful because it means the timing of my recordings more closely matches up with my narration later, and it helps ensure I take the time to show things that are mentioned in the script.
- I never intend on using this audio for anything. (In fact, I usually mute this audio once I start editing) So don’t worry about saying your lines perfectly. If you flub them up, just keep going!
- However, I should also point out that my co-worker tried this technique and hated it. She found it way too distracting to do while she was trying to focus on the coding, so feel free to ignore this step if it doesn’t work for you.
Make notes along the way and update your script
As you’re recording, you’ll realize that there will be places where your actual recording deviates from what’s in the script. These fall into a few categories:
- Little minor wording changes. Like, you said, “Preferences” when the actual option says “Settings”.
- You forgot to mention an important step along the way.
- You encounter an error, possibly because you forgot to include an important step in your original script, so you’re turning this into a “I’m intentionally running into this error so I can show you how to fix it” moment.
Anytime I encounter one of these moments, I’ll make a mark in my script — preferably in red ink — to note places where my script needs to change. Once I’m done with my screen recordings, I’ll go back to my script and make a final round of edits.
At this point, I should have a script that perfectly matches what’s in the screencast, so it’s time to start recording the audio!