Todd's Guide to Creating Video Tutorials
Okay, now that your script is really, actually, for reals, no take-backsies nailed down, it’s safe to record the audio.
Start with the right equipment
I covered some of this in Part 4 but let’s review!
To record good audio, start with a good microphone. I’m no audio expert, but you generally want to look for…
- A condenser microphone, which means it’s designed specifically for recording spoken vocals
- A unidirectional microphone, which records sound from just the front of the microphone, so you don’t pick up any room noise
- A USB microphone, which means you can plug it directly into your computer without the need for any additional equipment
I have a AT2020USB+, which is a pretty good microphone for the money. It also comes with a headphone jack in the microphone, which allows you to hear yourself on studio headphones as you’re speaking, which is nice. The Blue Yeti is also a popular brand for beginner podcasters, but (probably because it’s so popular with beginners) there’s also lots of people who think it’s overrated. I have no strong opinions either way.
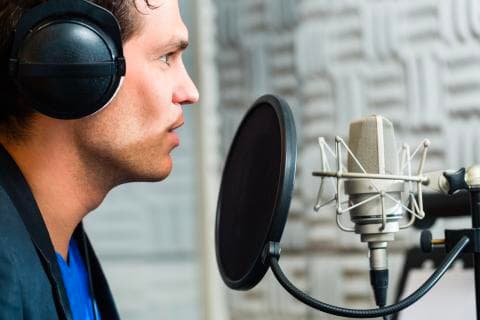
It’s probably worth getting yourself a pop filter, too. They’re cheap and stop you from accidentally blowing onto the mic whenever you say your plosives (these are sounds like Ps or Bs where you expel a bunch of air). Plus, it makes you look super professional, and you get to toss around words like “plosives”.

I mean, look at this guy! So professional!
For recording software, you can always record using something simple and free like QuickTime, but because I use Descript (see Part 4) for all of my audio editing, I’ll just record directly in there.
Preparing your environment
Before you start recording, you also want to minimize the amount of background noise in the room. Descript’s Studio Sound feature (more on this later ) does a bordering-on-magical job of doing this for you, but you want to give it all the help you can get. This means turn off any fans or large appliances you might have running, and this probably isn’t the time to start the dishwasher or do a load of laundry. If you have small children, send them in the backyard to play, or give them an iPad and some headphones. (Don’t worry — you’re still a good parent.)
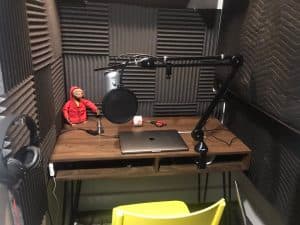
If you want to get really serious about your sound quality, cover up any hard surfaces you have in your room. I know people who have hung up blankets on the walls, or installed acoustic tiling in their home recording studios. All of this will reduce the amount of reverb you get in your audio recordings. A less extreme option is to get a little soundproofing “wall” that encircles your microphone. I’ve found that Descript’s Studio Sound option is good enough that I haven’t really needed to resort to either of these options yet.

There are also professional studios that have sound-proof booths made specifically for recording high-quality podcasts and voiceover that you can rent by the hour. I’ve never looked into this, though, since I’m guessing they’re pretty pricey.
Let’s get started!
Okay, ready to record? Here’s what you gotta do:
- If you have a microphone that allows you to plug in some studio headphones (and you also have those headphones), plug ‘em in! It’s nice to hear yourself exactly as your microphone hears you.
- Get yourself a glass of water. If you have a dry mouth, it’ll make gross little “clicky” noises. And speaking out loud dries out your mouth super fast. So it’s good to stay hydrated and take sips of water throughout the session.
- Make sure you have a nice ergonomic setup. Most podcasting microphones are directional, meaning that to get good audio, you need to speak directly into the front of the mic, so you’ll want to be directly facing the mic all the time. If you’re reading the script off of a monitor, set up your monitor so that it’s directly behind the mic. That way, you don’t have to turn your head as you read.
- If you’re using Descript, create a new project (name it with your show code!). Then click “Record
Audio”. If you’re in Quicktime, select “New Audio Recording”
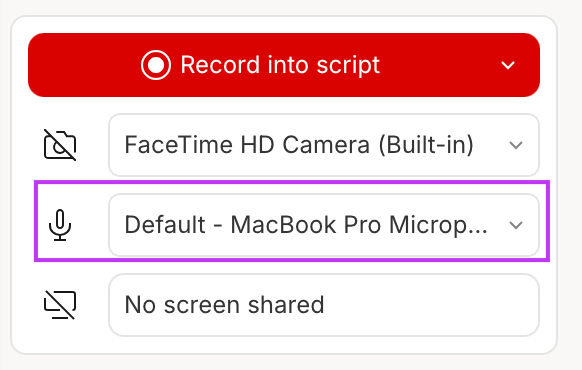
- Important! Make sure your fancy microphone is actually selected as your input microphone. You don’t want to finish up a 30-minute recording session only to realize you had the microphone on your closed laptop doing all the recording
- I may or may not be speaking from experience here

Make sure the right device is selected
- Test your sound levels. You don’t want to run into clipping issues where you speak so loudly that
it blows out the audio. Try saying a few lines and watching the levels in Descript / Quicktime.
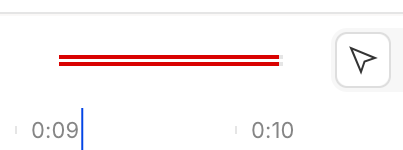
- In Descript, you’ll want to go to View-> Toggle volume in timeline to see the Volume Units in the lower right. When you play back your recorded audio, the bars will show the volume level, and turn yellow or red if you’re too loud. If those bars ever hit 100% (or get really close), your audio is probably too loud.
- You used to be able to get this feedback while you were recording, but it looks like that option has gone away. So, instead, try recordng a short test clip instead.

You generally don't want to see these red bars
- If your audio is too loud, you can adjust the audio input level in your Mac’s “Sound” preferences panel in the Input tab. Mine is typically set to 75%, but YMMV.
- Also important! Make sure you actually click the “record” button before recording.
- I also may or may not be speaking from experience here
Tips while recording
Now it’s time to actually record! I tend to read my script off of the monitor instead of paper. This makes sure I’m not looking down, and also avoids any rustling-paper noises.
I recommend recording your entire script in one day. If you end up breaking things up into several sessions on different days, there will be subtle differences with your microphone setup or ambient audio where it will just sound different. The only exception to this is the on-screen camera bits (see the next section), where it’s fine if your voice sounds different. And, to be clear, it’s fine if you want to stop recording to get yourself more water or take a short break.
If you make a mistake, go back to the last natural pause (probably the last sentence or paragraph) and say the sentence again. It’s pretty easy to edit those mistakes out, but it helps a lot if you can do the edit where there’s a natural break in your narration.
It can be tough to sound natural when you’re reading. One tip that really helps is pretend like you’re just speaking to a friend. Don’t be afraid to be casual! I also find that it helps to slightly over-enunciate when you’re talking, which I know goes against the “sounding natural” bit, but… uh… try to do both, I guess.
Also, this is harder than it sounds, but try thinking about the meaning of what you’re trying to say, and not just saying the words in front of you. I’ll sometimes find myself in Ron Burgundy mode and getting into a weird mental state where I’m saying the words out loud without really thinking about what I’m saying. If that happens to you, stop. Take a moment to really consider what you’re saying and why, and then try it again.
Okay, now that the audio portion is done and you’re all weirded out by the sound of your own voice, it’s time to get really uncomfortable and record yourself on camera!