Todd's Guide to Creating Video Tutorials
Now that you have your audio all set, you’re ready to edit your screencast! For most of you, this will be the biggest chunk of your editing work.
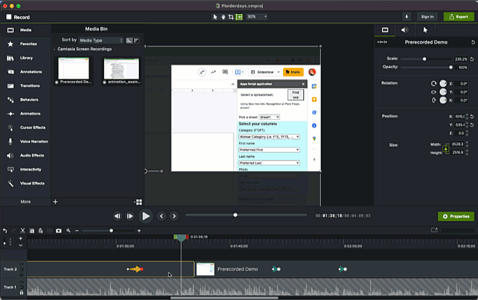
I use Camtasia for editing screencasts, because it’s designed specifically for that purpose. And while I end up using Premiere Pro for my final editing pass, I would actually say that if you could only pick one piece of editing software, use Camtasia. It’s easier to edit the non-screencast portions in Camtasia than it is to edit screencast portions in Premiere.
Again, a full guide on how to use Camtasia could be an entire blog series on its own, but I might recommend going to Techsmith’s Camtasia Tutorials page and going through most of those. Honestly, there’s probably some stuff in there that I’m missing, too.
But with that said, here’s my general guide for editing your screencasts in Camtasia.
Setting up your project
- First, make sure your project settings are set up correctly. Go to Edit… Project Settings and make sure that your dimensions are set to 1080p (1920x1080).
- Go to Camtasia…Settings…Project and make this your default setting, too.
- This is really important! It probably will not be your default, because your project settings will be set to whatever your first recording resolution was.
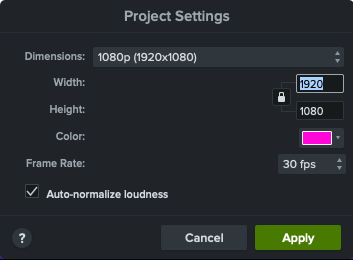
- Also, double-check your framerate is set to 30 fps (it should probably be that way by default).
- I like to set my background color to a bright pink. That makes it easy for me to see if I messed up somewhere and didn’t expand the video to fit the contents of the canvas.
- If you accidentally mess this up and only notice after you began editing your video, all is not lost.
- Change your project settings to be correct.
- Fix a clip to be correct by dragging the corners until it looks right.
- Then right-click on the clip and select “Copy properties”.
- Right-click on a destination clip and select “Paste properties”.
- This is really important! It probably will not be your default, because your project settings will be set to whatever your first recording resolution was.
- If there’s already a recording on your timeline, you can delete it. It should still be saved in your Media Bin.
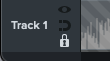
- Next, import the audio file you exported in the previous step, add it to the bottommost track, and then lock the track.
- You’re going to treat this audio track as your main point-of-reference. All the video editing you make will be tied to this audio.
- Here are some important keyboard shortcuts I use all the time. (I’ll cover some of these later in this post.)
- Space — pause/play
⌘ +/⌘ -— zooms in and out the video screen- Hold down space — turns your cursor into a hand you can use to grab and move the video screen around (useful when you’re zoomed in a lot)
⌘-Shift +/⌘-Shift -— zooms in and out the timeline⌘-T— splits the video clip⌘-Shift-T— splits all video clips at the current playhead, even if you haven’t selected them⌘-Backspace— ripple-deletesShift-A— adds an animation up to your playhead
- Now, we can start editing! I usually do two passes in my editing: a “timing” pass, and then a “framing and annotations” pass. Let’s go over these one at a time.
Editing for timing
For the timing pass, what you want to do is edit your screencast so that whatever’s happening on screen matches up with what’s in your audio.
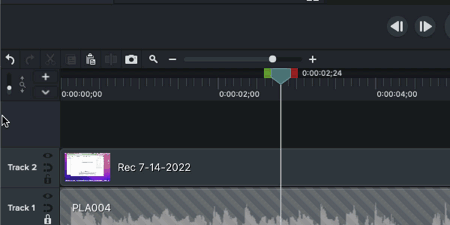
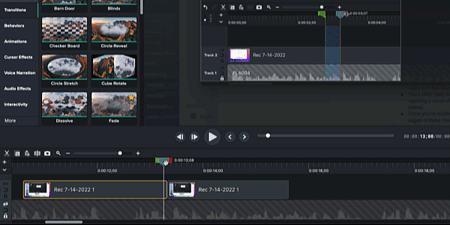
- First, start by adding your recordings to the timeline right above your audio track.
- You can go ahead and roughly position them in terms of zoom level and such, but I find it’s easier to save any fine-tuning of your panning and zooming to the next pass.
- If you have sound in these recordings (because you were reading your script aloud as you were recording), you can probably mute them. I find them more distracting than helpful.
- To cut out chunks of your recording, perform a “Ripple delete”:
- Drag the red or green flags next to your playhead to select the chunk of video you want to delete.
- Then, select ⌘-Delete. This will remove that chunk of video, and “stitch” the rest of your video together.
- I do this a lot in my editing — particularly to remove long pauses in my recording when I was looking up what to do next.
- I also use ripple deletes to remove any typos. I make a lot of typos.
- Just ripple delete from just before you started your typo until just after you corrected your typo and input the correct character, and voila, it looks like you’re a perfect typist!
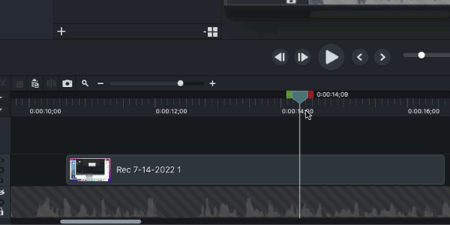
- You can also divide your video into multiple chunks using the “Split” tool.
- Select the video track in the timeline, and select ⌘-T. Now your video is in two chunks!
- You’ll often need this to dissolve between different scenes, or when applying a visual effect to one part of your video (like Clip Speed — see below).
- Once you’ve divided your video into different chunks, you can drag the edges of these chunks to easily trim the beginning or end.
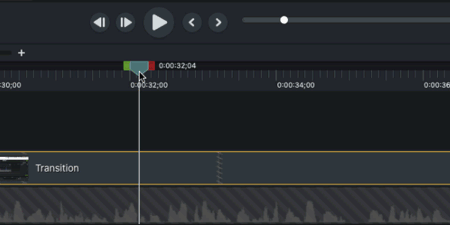
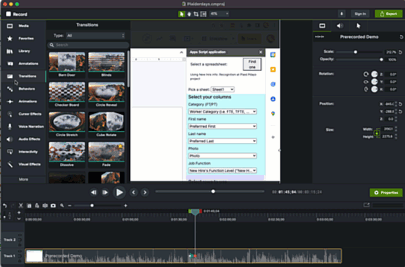
- If you need to cut between two different scenes, use a transition effect.
- Since directly cutting between two different scenes is disorienting in a screencast, I recommend adding a dissolve transition between them.
- To transition between clips, make sure they’re next to each other in the timeline, then go the Transitions panel, and drag a transition to the border between the two clips.
- Camtasia comes with about two dozen transition animations. 22 of which are distracting and/or look like your aunt’s home videos.
- Keep it simple — I prefer good ol’ fashioned Fade (cross-fading between two scenes) and maybe a Fade Through Black or Glow (which is essentially a Fade Through White).
- Make sure “Use trimmed content” is unchecked in the properties panel. That’ll make sure your transitions don’t include elements you meant to cut out.
- Keep your transitions quick! I generally go with a transition duration of 16 frames when transitioning between different scenes, and a duration of 8 frames when transitioning between code chunks (more on that below).
- Need to speed up your recording to fit your audio? Use the “Clip Speed” effect.
- You can drag it from the “Visual effects” panel into your timeline, or right-click on the video in the timeline and select “Clip Speed”.
- Then, you can speed up or slow down the recording as much as you want!
- Better yet, you can speed up the video to exactly fit a cut of audio by mousing over the Clip Speed track in your timeline (your mouse will become a stopwatch) and then dragging the track longer or shorter. Camtasia will automatically speed up the clip speed to match the clip size you’ve designated.
- Note that the clip speed effect is applied to the entire clip, so I usually prefer to Split the clip so I’m just speeding up the relevant portion.
- It’s best if you first ripple-delete any long pauses in your video clip before you apply any Clip Speeds. This’ll make sure you don’t have to go quite as extreme when you’re speeding things up.
- Need to pause on a certain frame? Camtasia has this really great feature called “Extend frame”. All you need to do is Option-click at the end of a clip, drag it out, and Camtasia will extend the very last frame of the clip for as long as you want.
- When it comes to typing out code, you’ll usually find that your recorded audio is much faster than your actual typing.
- I used to use Clip Speed to speed up my typing to the point where it matched my audio, but it tended to look weird. So now I go with a series of quick cuts with fades between them.
- This generally involves a lot of Splitting, Frame extending, and Fading. So get used to those tools!
Editing for framing
Once you have your content timed out perfectly to your audio, it’s time to start positioning the camera exactly where you want it.
- Let’s start with some general guidelines:
- Remember that often developers will be looking at your video on their phones, or on a little window off to the side of their IDE so they can code along with your video.
- This means you want to zoom in as much as you can so that your code is readable, and that any extraneous elements are off-screen.
- Just don’t zoom in so much that it’s hard for viewers to see a logical chunk of code/UI/etc on screen at once.
- Remember that often developers will be looking at your video on their phones, or on a little window off to the side of their IDE so they can code along with your video.
- At the beginning of a scene, before I zoom in, I often like to set up an “establishing” shot that’s a little more zoomed out.
- That way, people can take a moment to orient themselves (“Oh, Todd’s editing server.js file in VS Code”) before I zoom in on the content.
- I’m also paranoid and I don’t like to let anybody know what applications are running on my screen. So even in my most “zoomed out” mode, I’ll never show the menu bar on my Mac (where people can see what utilities I have running) or the dock at the bottom (where people see what utilities I have installed).
- When it comes to framing your code, you want a little bit of padding to the sides and a little more padding at the top of your code (if it’ll fit). It’ll look better, and it won’t conflict with any of the UI or text that YouTube likes to display on top of your video.
- In other words…
Bad framing:
Good framing:

- Okay, with those guidelines in mind, let’s talk about actually adding the panning-and-zooming animations to your screencasts.
- Camtasia creates animations by putting two “keyframes” on your timeline. You position the screen where you want (in terms of positioning and zooming) before the first keyframe, then do it again after the second keyframe. Camtasia will automatically transition between the two keyframes over the space between those two keyframes.
- I animate everything by using Camtasia’s “Custom” animation, which puts two keyframes on your timeline at your current settings. Then you can adjust them as you need.
- All of Camtasia’s other animations are basically the same as the Custom animation, but with values pre-filled in for you. They’re almost never exactly what you want, though, so I almost never use them.
- So in this example below, I’m zooming in to a portion of my screen by dragging a “custom” animation to my timeline, zooming in to where I want the animation to end up, and Camtasia smoothly animates between my old position and my new one.

- Useful shortcut: If you select your timeline and hit Shift-A, Camtasia will put a custom animation in the timeline, ending at exactly where your playhead is. I find this super handy. I’ll be watching my video and think, “Ahh… I should probably zoom in to this part of the page here”, so I hit Shift-A, zoom in to where I want to be, and I’m done!
- Camtasia also has an “Auto animate” mode, which will automatically insert animation markers onto the timeline as you drag around the movie clip. It sounds like a really useful feature, but in practice I don’t use it much.
- You’ll often run into places where you’ll zoom or pan to a new position at the end of one clip, but then you’ll want those changes reflected in the next clip. (Often because you’ve split one clip up into several pieces.) You can do that with the copy / paste properties command.
- To do this, make sure your playhead is in the section you want to copy from (yes — your playhead, not just your cursor!). Right click, and select “Copy properties”.
- Then, select the clip(s) you want to match up to this clip, right click and select “Paste properties”.
- There is no keyboard shortcut, and it drives me crazy, given how much I use this feature.
Editing for annotations
The same time that I’m working on the panning and zooming, I’m also adding in annotations. (Usually. If it’s a complicated tutorial, I’ll sometimes save the annotations for a separate third pass.) Once I’ve finished the panning and zooming for a clip, I like to go back and add in any annotations I need.
- Annotations generally fall into two categories:
- Calling attention to things the user should pay attention to
- Hiding things that should be kept secret
- Camtasia comes with about 80 different annotations that you can use, but I keep to about 5 of them. Again, keep things simple and make sure users are focused on your content, not your crazy annotations.
- To create an annotation, select the Annotation panel, and drag the annotation onto your canvas or timeline. Camtasia will put it onto a separate track like another media clip.
- You can scale, move, lengthen, shorten, and transition in and out of annotations just like any other piece of media.
- To highlight small chunks of code, I like using the “Sketch motion” annotations.
- I’ll go with the rough oval for single lines, and the “nice looking square” for multiple lines.
- If you’re in light mode, I’d recommend a bright, noticeable color with a thickness of 5.
- If you’re in dark mode, a bright yellow works well.
- To highlight larger blocks of code or UI elements, I’ll usually go with a yellow highlight.
- This really only works if your IDE is in light mode. If you’re in dark mode, stick to the sketch motion.
- If you need to point to something with some text, you can use the “Speech bubble #2” annotation.
- Use a white background with a black outline (with a thickness of 3).
-
It does help to have a “standard library” of annotations that you can call upon for easier editing. - I can’t for the life of me figure out how to change the default color / line thickness of annotations (And copy/paste properties ignores color and line thickness) - But what you can do is right-click your annotation and “Add to Library”. - At that point, the annotation you created (with color changes and transition effects) will be saved in the Library panel and you can reuse them again. - To highlight larger blocks of code or UI elements, I’ll usually go with a yellow highlight - This really only works if your IDE is in light mode. If you’re in dark mode, stick to the sketch motion rectangles.
-
You can animate annotations!
- The same way you can pan / zoom / fade video clips, you can also do the same thing with annotations. I often do this when I’m jumping quickly between lines in my code.
- You should also make sure you add “Fades” to fade in and out your annotations.
- Except the sketch motion ones. Camtasia automatically adds the “draw in” bit. You just need to make sure you fade those out.
- Don’t use blurs!
- You might think you could use the blur filter to blur out sensitive information (like access keys and secrets), but you’d be wrong!
- The problem with blurs is that a sufficiently motivated attacker could reverse engineer them.
- Instead, if you need to hide sensitive information, just put a solid white rectangle on top of them. Or make it off-white to make it clear you’re covering up something and there’s not some missing data.
- Some of the trickiest parts of annotations is having to annotate a video clip that, itself, is panning or zooming. How can you get your annotation to follow the video clip?
- Probably the best way to handle this is to use a group.
- Remove your animation from the original clip.
- Put your annotation where you want it to be.
- Select your clip and annotation and select “Group” from the edit menu.
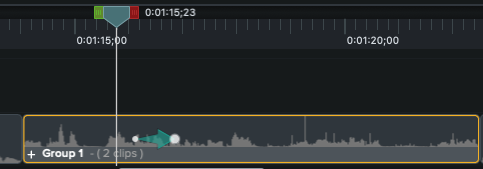
- Then animate your group, and everything in the group (your media clip and your annotation) will smoothly animate together.
- Cross-fading between two clips can also be difficult if you’ve got an annotation trying to keep things secret.
- If you’re not careful, the annotation will end before the fade is finished, meaning that you’ll be able to see the access code / client secret for a few frames as you’re transitioning into the next clip.
- Again, this can be fixed with a group. Group the clip and the annotation together, and then when you cross-fade the group into the next clip, the annotations will stay the entire time.
Exporting
- Once you’re all done, you can export your screencast (if you’re planning on editing everything together in another application like Premiere).
- To do that, select “Export… Local File…”
- Keep it as a Quicktime movie.
- Keep all other default options.
- If you’re planning on using Camtasia to edit together everything, just move on to the next step.