Todd's Guide to Creating Video Tutorials
Hopefully at this point, you’ve gotten back any updated graphics or layouts for your slides (maybe from a designer, or maybe you’ve polished them yourself). Now’s the time to update your slides into their final form.
Updating graphics
If you’ve got a complex animation in your slides and want to replace an image without breaking the rest of your animation, you can do that with the “Replace Image” function.
- You might think you could do this by selecting “Replace Image” from the right-click menu, but you’d be wrong!
- Apple will only let you select images that have been imported into Apple Photos if you choose this option.
- I’m pretty sure this is the direct result of a “product synergy” OKR from some Apple Photos PM who has since transferred to another team.
- So instead, select the image, then select the Image panel on the right and click the Replace button.

- Select the file you want to use instead.
- Keynote will replace the image you were using with the new image…
- …but any animations or edits you have applied to the image will still be there, so you don’t need to redo all your work.
Exporting slides
Go ahead and make sure all the animations are working as intended, then we can move on to the next step: exporting your slides into a movie! You can do this in Keynote by selecting “File… Export to… Movie”.
There are two ways you can do this. The simple way (that will mean a bit more work later) is to select a “Self-playing” slideshow. In this slideshow, Keynote will automatically switch between slides at a set interval, and automatically play any animations (or “builds”) at another interval.
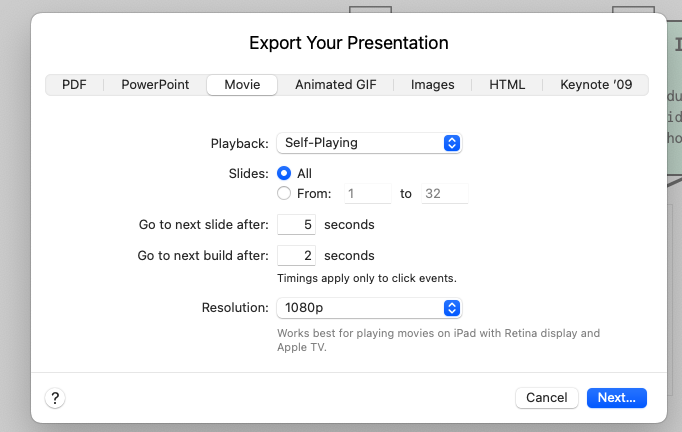
This is easy, but it also means that the timing of your slides will be all off, and you’ll need to fix this in editing later.
The way I like doing it involves a little bit more work up-front, but makes your slideshows easier to edit later. I’ll record my slideshows with the timings that I want in the final video, and then I’ll export my recording.
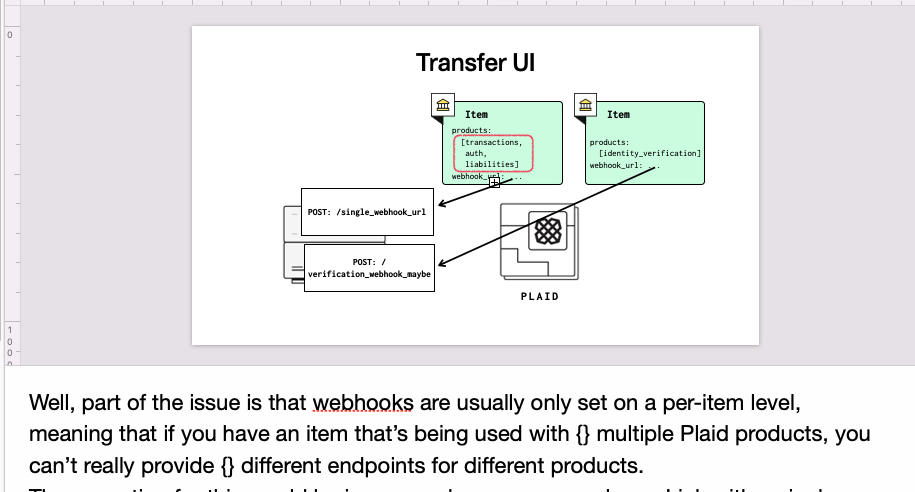
To do this, I will copy-and-paste the content of my scripts into the speaker notes of my slides, and put little curly brackets {} at the points where I want to advance the animation.
Then, what I’ll do is record the slideshow. (From the “Play” menu, select “Record Slideshow”, then hit the record button). I can then read out the dialog and advance the slides along with what I’m reading, and that’ll help me get timings that are a lot closer to the final product.
Actually, that’s a lie. I go even further than that. I’ll take the actual exported audio and play that. As it’s playing, I’ll switch to Keynote, start recording, and then advance the slides to the actual audio. It works really well, and it means when I export the final product, it matches up with my audio exactly as I want it. (Or really close, anyway.)
This works for short videos where you’re okay listening to the entire audio recording. For a longer 30 minute video (where you might have your slides spread out among the entire recording), that might be too much. In that case, you might want to try just playing along with the recording at the beginning, and then just winging it for the rest of the slides. Or split your presentation up into several different files and record them separately.
Once you’re done with your recording, export your video like before, but select “Slideshow Recording” instead of Self-Playing. That will then export your video with the same timing as your recording.
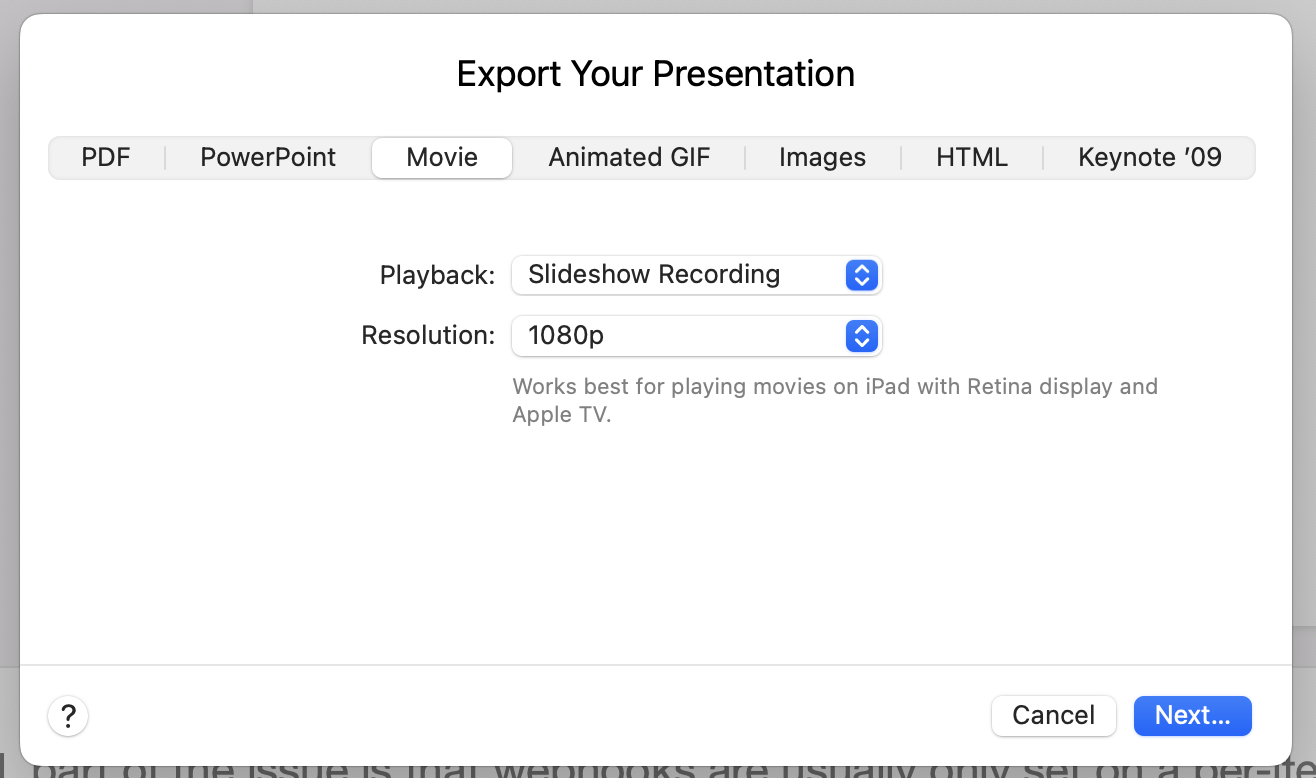
Normally, 1080p is just fine as an export resolution. However, if you see noticeable aliasing, try increasing the resolution to something like 4k (3840 x 2160), which you can do via selecting the custom export settings. Mysteriously, I’ve sometimes seen additional image degradation in Keynote .mov files when exporting at 1080p that doesn’t appear in the final video if you export the Keynote at 4k, even though the final video is also exported at 1080p.
One note: once you’ve created a recording, Keynote will warn you that your recording will get all kinds of messed up if you do anything that might change this recording (like adding a new slide or adding a new animation). Also, the normal key command you use to play your slideshow (Command-Option-P) will now default to playing your recording, which I find really annoying.
(Part 12 coming soon!)